 rt.com
- RT versions:
- روسيا اليوم
- Noticias
- Инотв
- RTД


How to Install the Cyrillic Keyboard for Windows XP on Your System
Take the steps below to install the Cyrillic keyboard for Windows XP on your system.
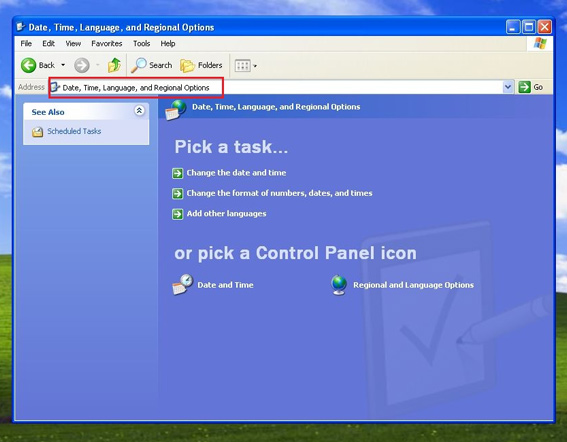
1.
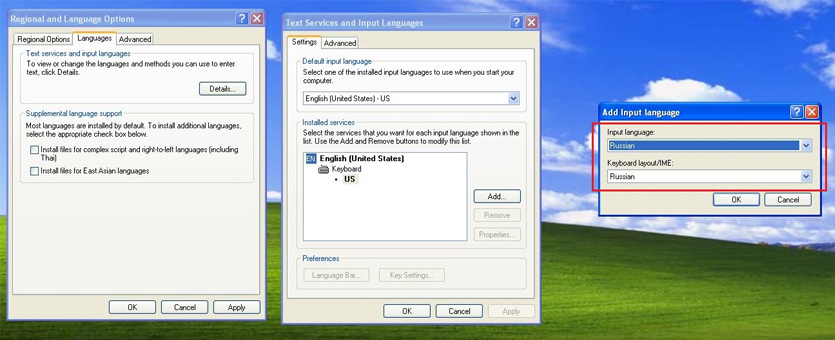
Open the Control Panel by clicking "Start" → "Control Panel" → "Date, Time, Language, and Regional Options".
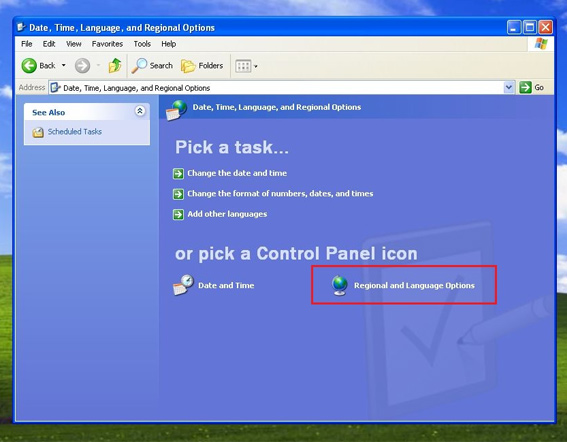
2.
Click "Regional and Language Options".
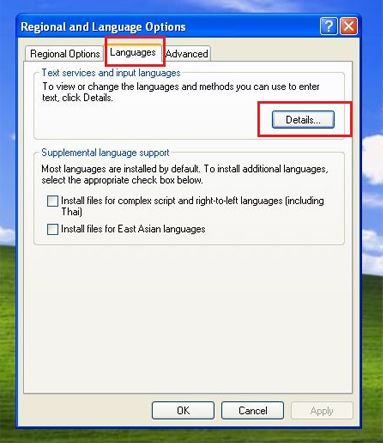
3.
In the window that opens click the "Languages" tab and then the "Details…" button.
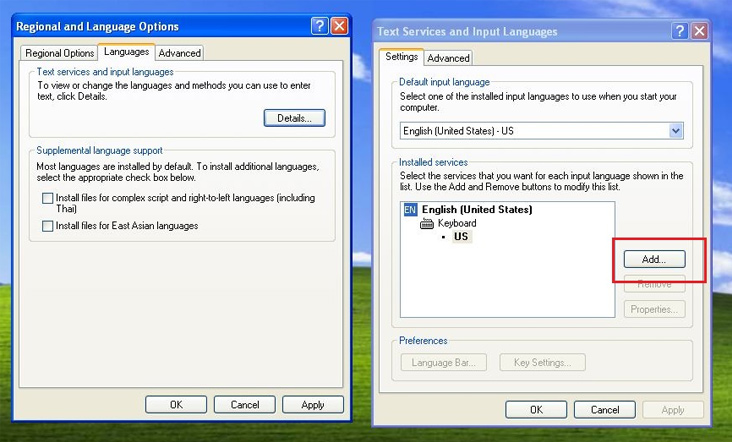
4.
Click the "Add…" button in the next window.
5.
In the next window select "Russian" as your input language to activate Cyrillic keyboard for Windows XP.
6.
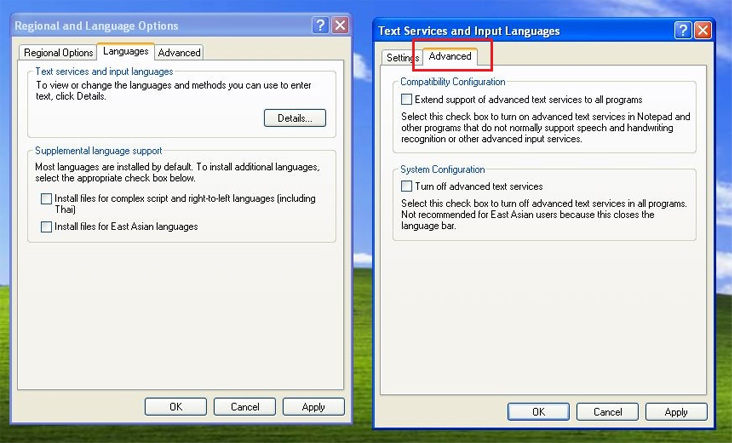
Click "OK" and then the "Advanced" tab in the "Test Services and Input Languages" window.
7.
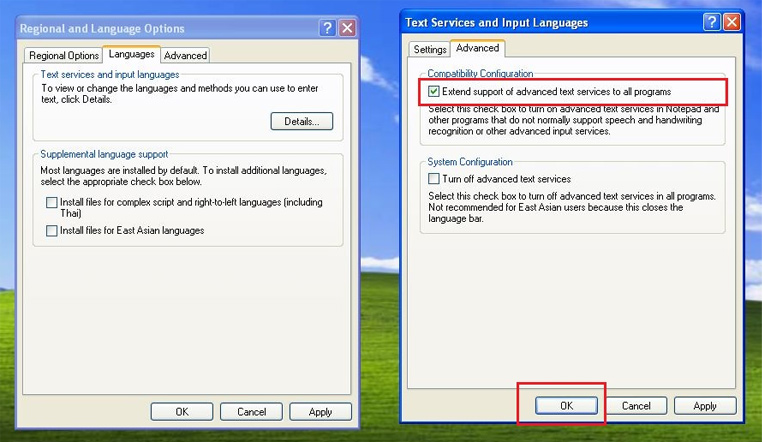
Check "Extend support of advanced text services to all programs" and click "OK". This step enables programs on your computer to work properly with the Cyrillic keyboard for Windows XP.
8.
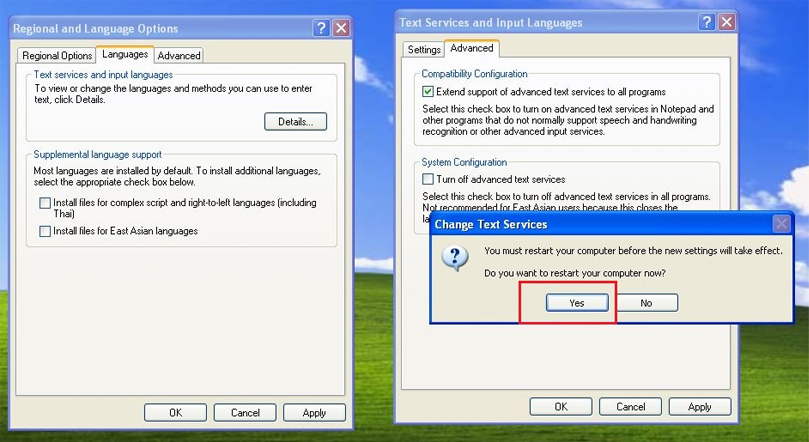
Restart your computer.
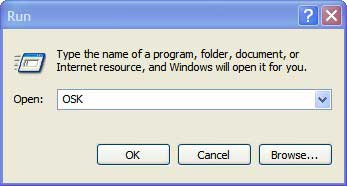
If your keyboard does not have Cyrillic letters on it, you can use the on-screen keyboard. Click "Start" → "Run" → "OSK". Use your standard method of switching between languages to change the layout of the on-screen keyboard from the Cyrillic keyboard for Windows XP to the other layouts you have or change it back to Cyrillic.


- Legal disclaimer
- Feedback
- Contact us
- What it is all about
- Words in pictures
- © Autonomous Nonprofit Organization "TV-Novosti", 2005 – 2020. All rights reserved.